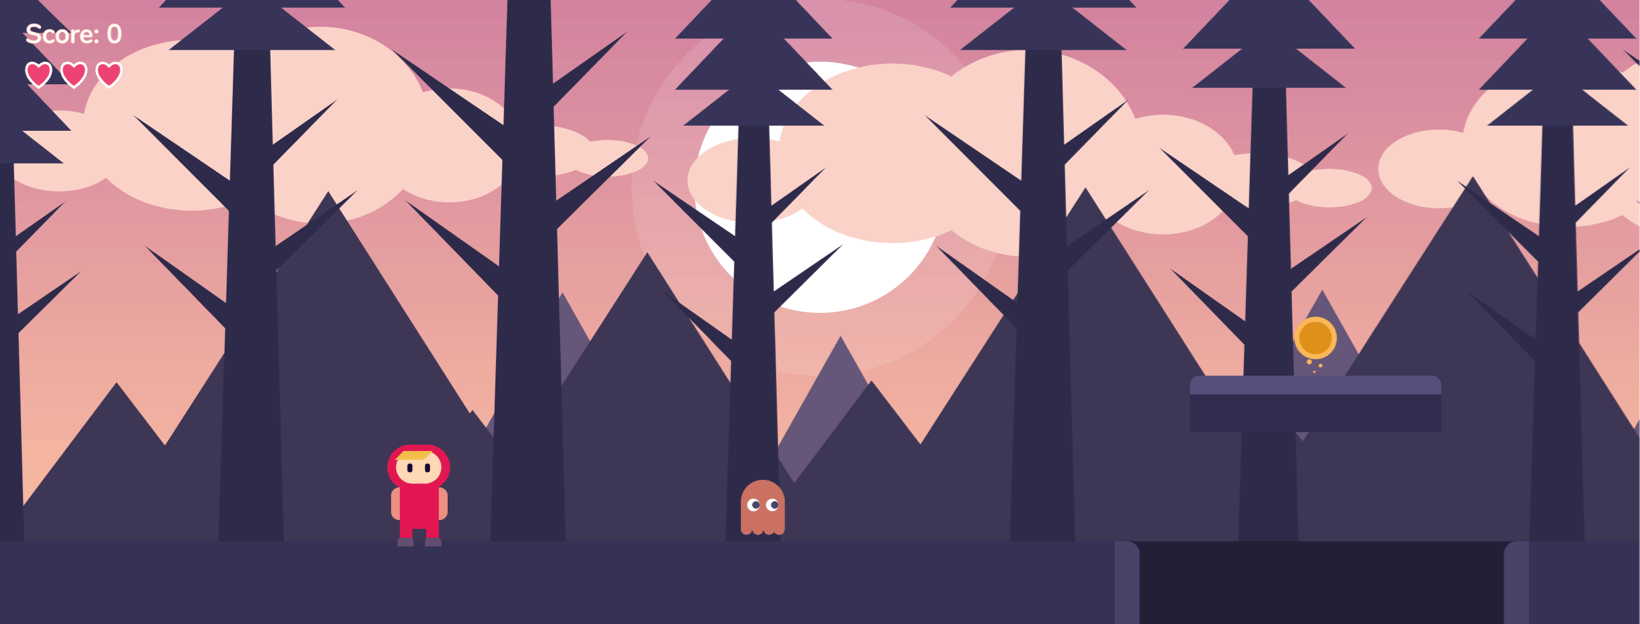
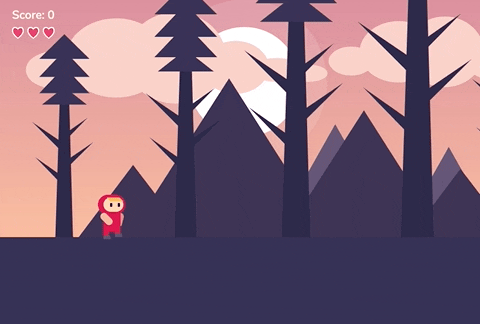
Side-Scrolling Game Design Experiment
2019I designed a 2D side-scrolling game inspired by the classic Mario game and developed a proof of concept in Javascript, HTML canvas and WebGL.
Design
Characters
Environment


Putting Them Together
Developing the Game
Library
Developing the proof-of-concept game, I took advantage of the p5.js library which is a Javascript library for creating full set of drawings on canvas.
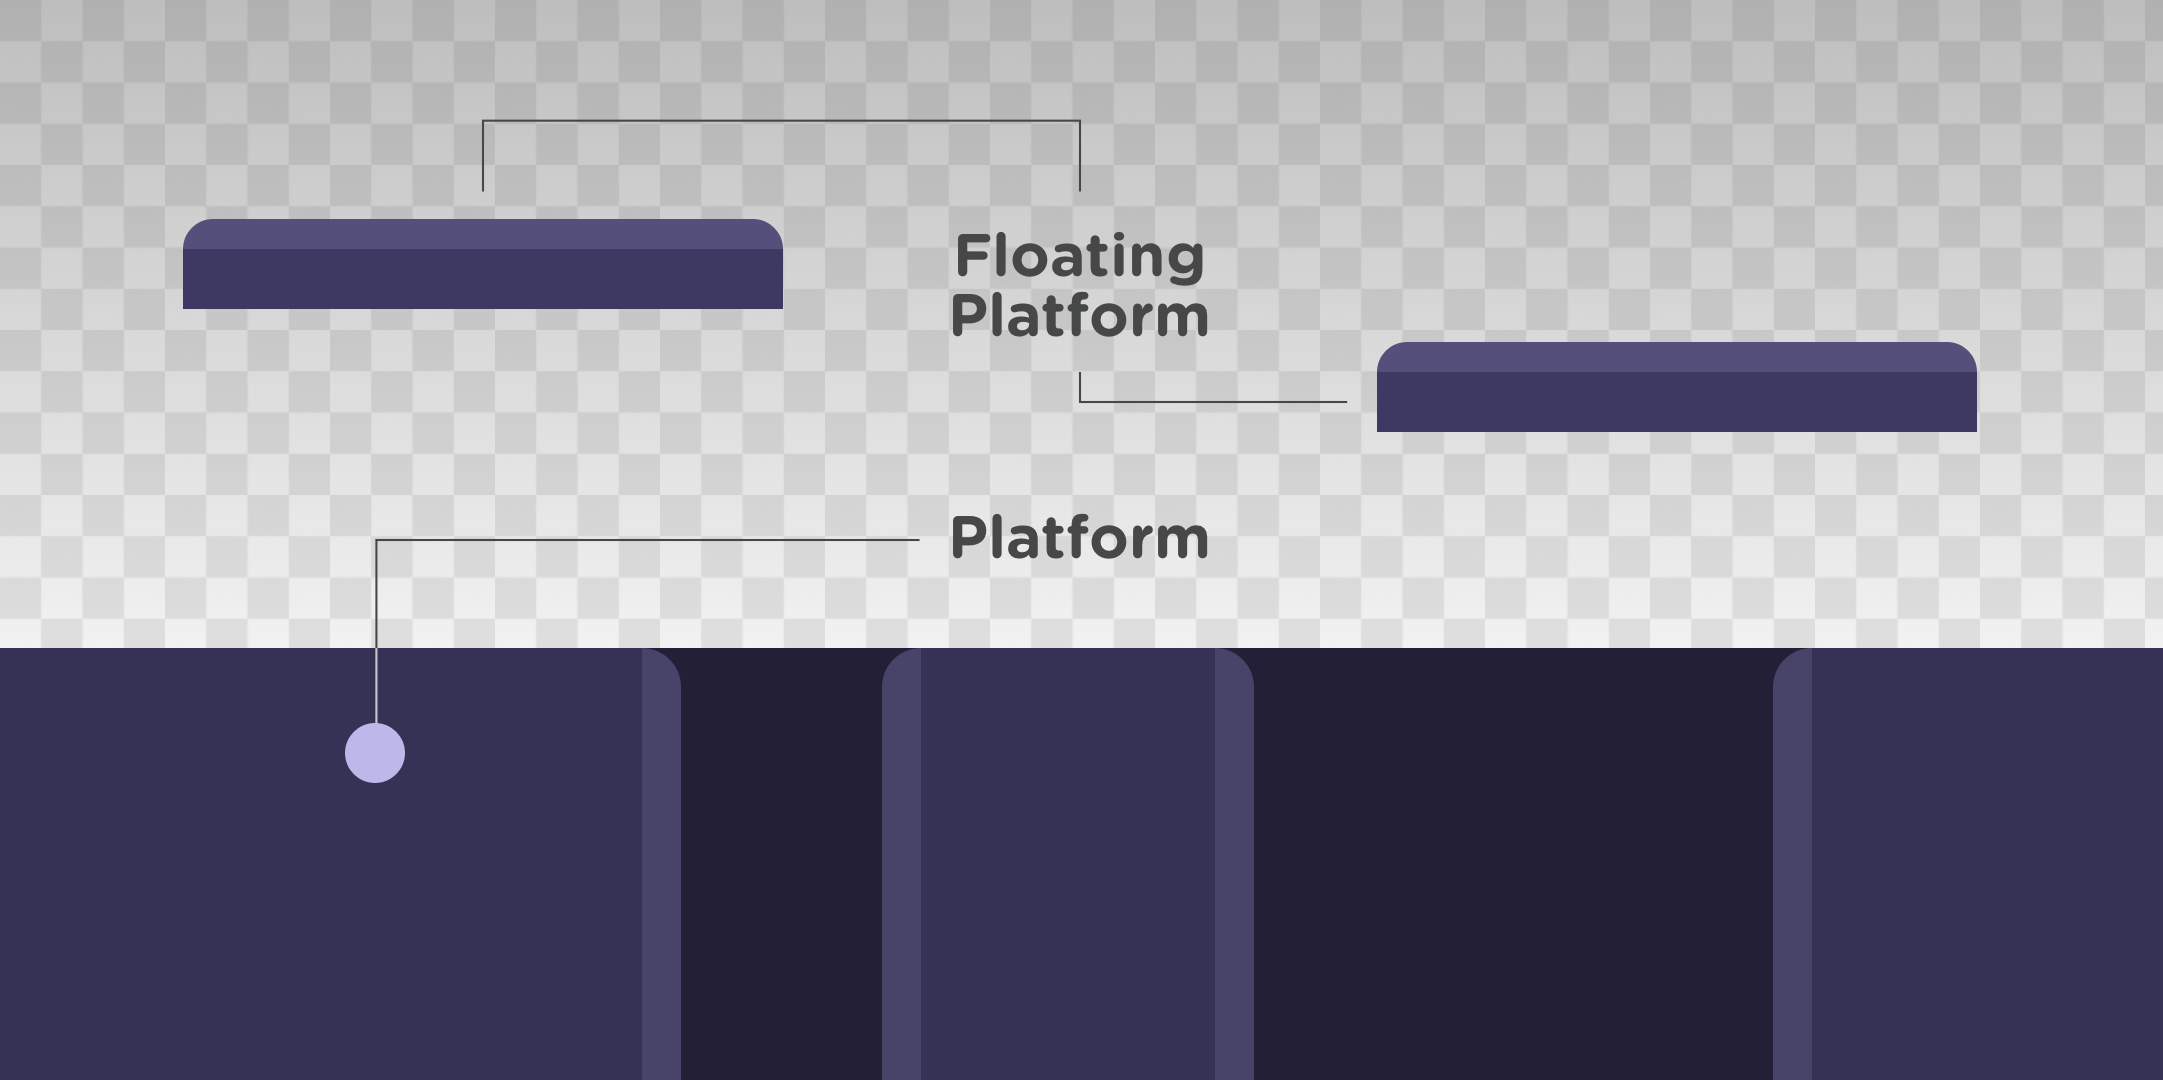
Creating the Game Environment
1. Rendering the Backdrop
Creating the backdrop is easy with just a few lines of code in the setup() function and a custom function to create gradient background.
setup() {
  // Render backdrop.
  background(250, 190, 160);
  let c1 = color(210, 130, 160); // top colour
  let c2 = color(250, 190, 160); // bottom colour
  setGradient(c1, c2);
}

/**
 * Set a gradient background based on top and bottom colour.
 * @param {object} top_colour - p5js color data object
 * @param {object} bottom_colour - p5js color data object
 */
function setGradient(top_colour, bottom_colour) {
  noFill();
  for (let y = 0; y < game.floorPos_y; y++) {
    let inter = map(y, 0, game.floorPos_y, 0, 1);
    let c = lerpColor(top_colour, bottom_colour, inter);
    stroke(c);
    line(0, y, width, y);
  }
}
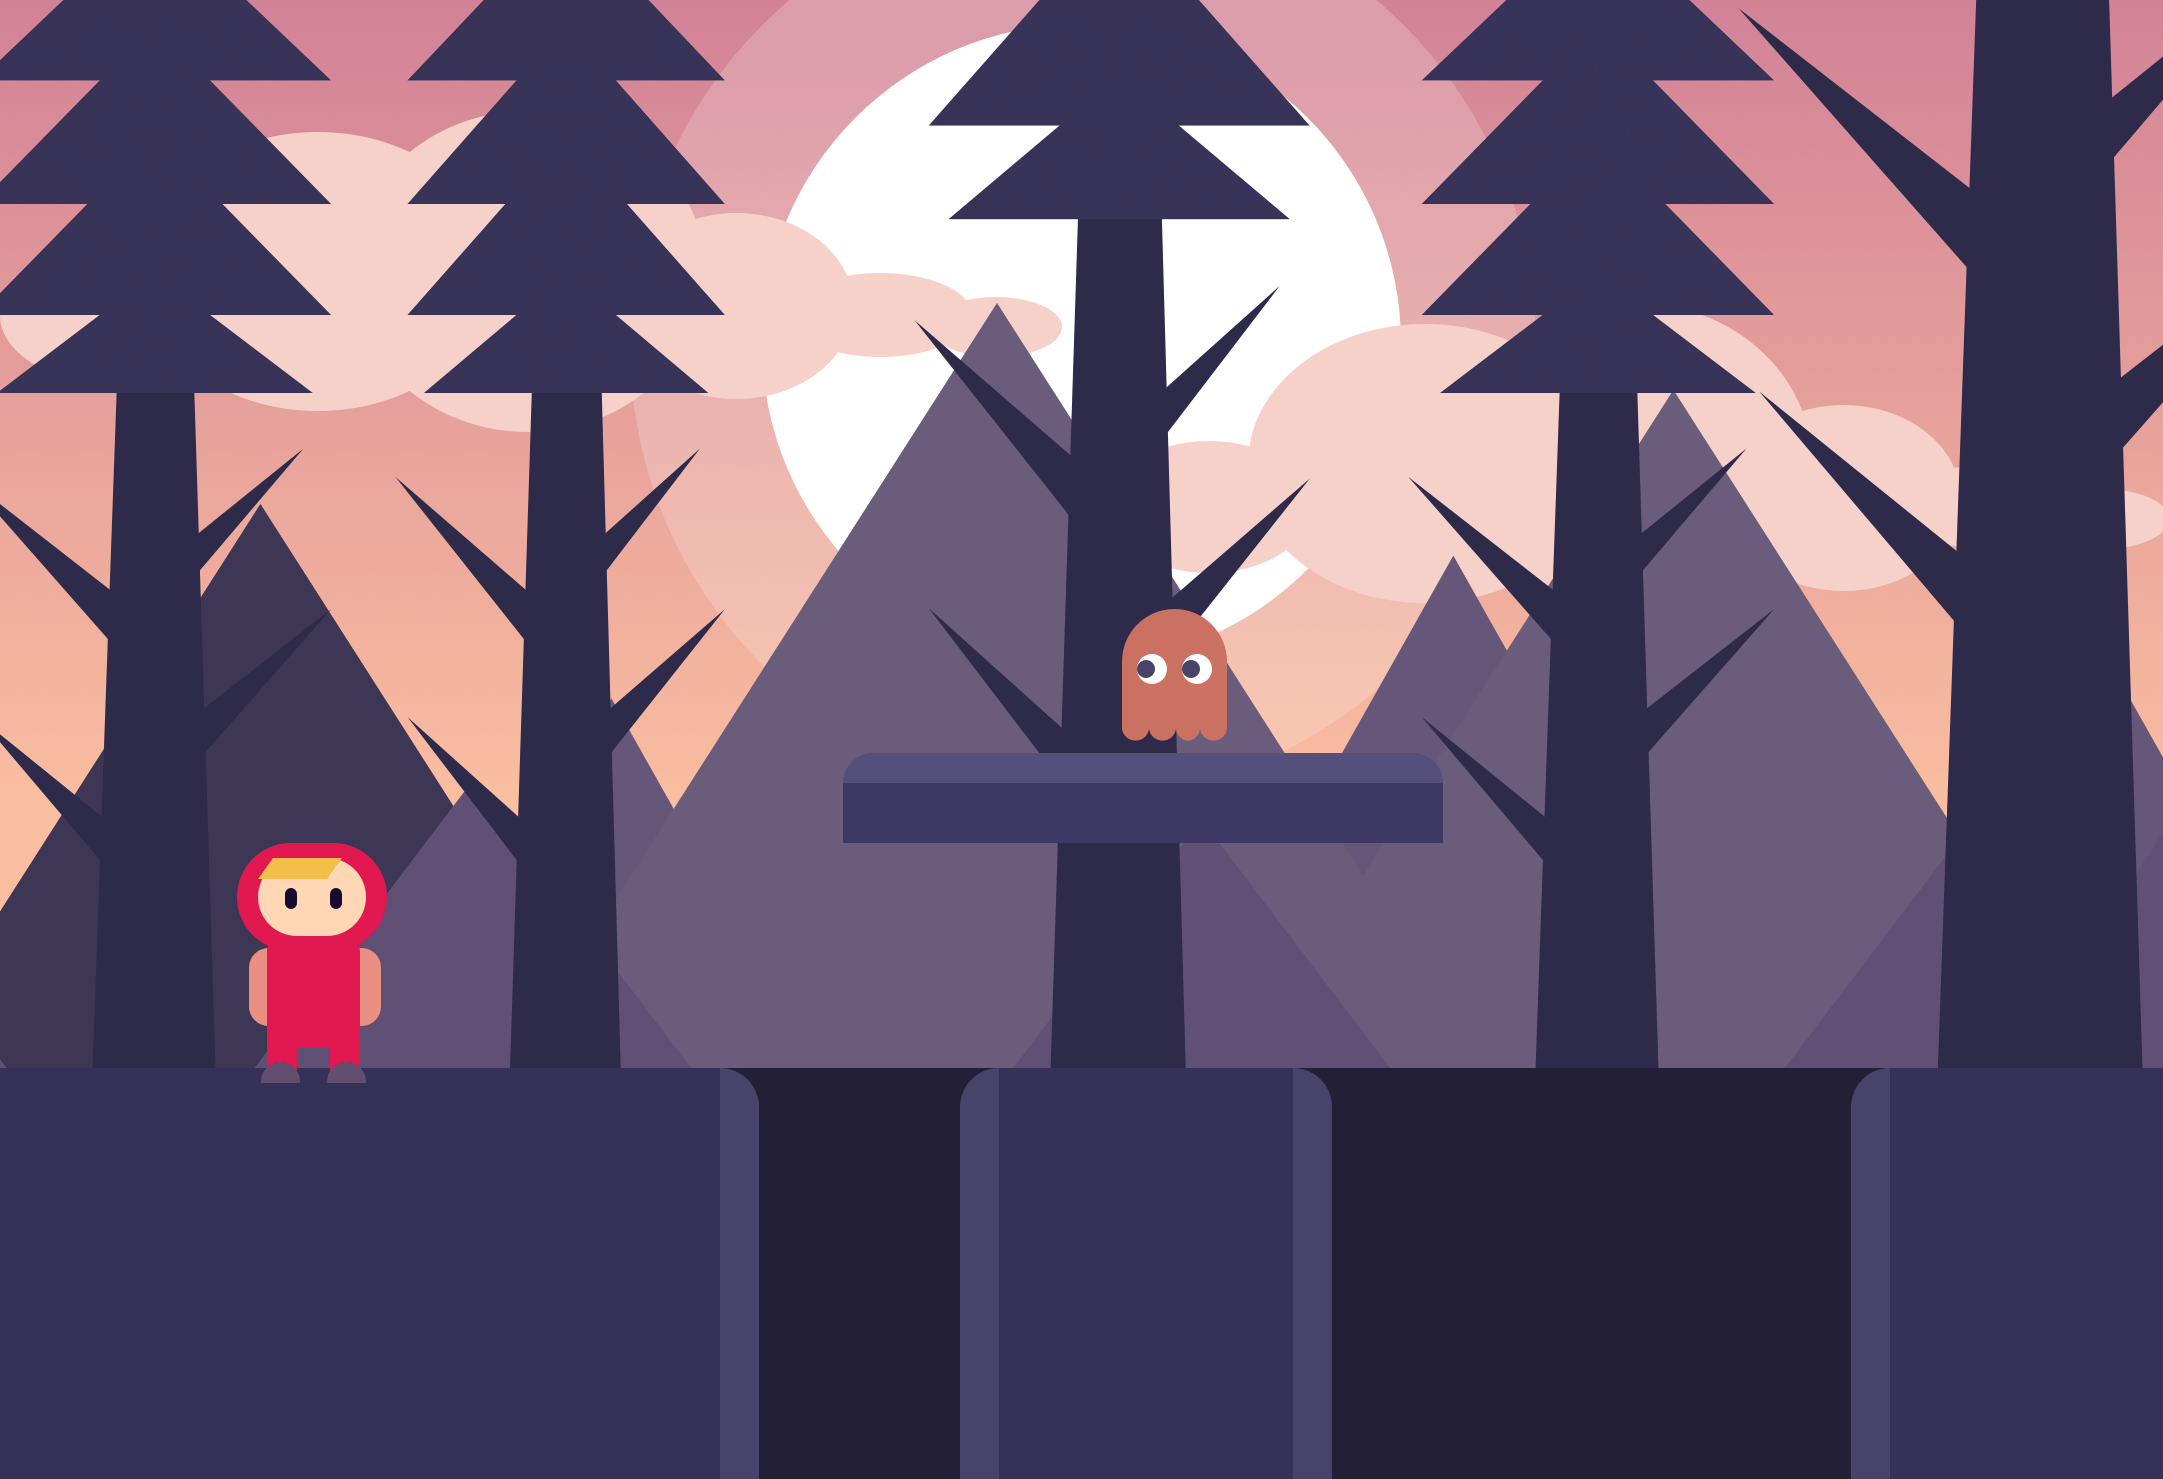
2. Rendering the Sun
The sun is just a single entity with two circles that will be rendered on canvas.
draw() {
  // Render sun.
  renderSun()
}

/**
 * Renders the sun in the game environment.
 */
function renderSun() {
  push();
  noStroke();
  fill(255, 255, 255, 30);
  ellipse(width / 2, 150, 300);
  fill(255);
  ellipse(width / 2, 150, 200);
  pop();
}
3. Rendering Clouds
This is where it gets a little tricky because we need to render multiple random clouds in the game in order to create continuity in the game. We can create a function to return a random cloud object as the character moves from one screen to the next.
/**
 * Creates a cloud object and returns it.
 * @param {number} x_pos - x position of the cloud.
 * @param {number} y_pos - y position of the cloud.
 * @param {number} scale_val - scale of the cloud, where 1 is
 * 100% scale. (1.0 to 1.6 is recommended)
 */
function createCloud(x_pos, y_pos, scale_val) {
  let cloudObj = {
    x_pos: x_pos,
    y_pos: y_pos,
    scale: scale_val,

    // Render this cloud.
    render: function () {
      push()
      translate(this.x_pos + game.scrollPos * 0.1, this.y_pos)
      scale(this.scale)
      noStroke()
      fill(250, 210, 200)
      ellipse(34, 68, 68, 44)
      ellipse(106, 54, 118, 93)
      ellipse(176, 54, 118, 107)
      ellipse(246, 65, 78, 62)
      ellipse(294, 68, 61, 28)
      ellipse(332, 72, 44, 20)
      pop()
    },
  }

  return cloudObj
}
Then it can be called in this way inside the setup() function and then renders them in the draw() function.
setup() {
  let clouds = [];

  // Initialise clouds.
  for (let i = 0; i < cloud.quantity; i++) {
    let randomCloud = createCloud(
      i * cloud.randomGap,
      cloud.randomY,
      cloud.randomScale
    );
    // array of clouds to be rendered in draw() function
    clouds.push(randomCloud);
}

draw() {
  // Render clouds.
  for (let i = 0; i < clouds.length; i++) {
    clouds[i].render();
  }
}
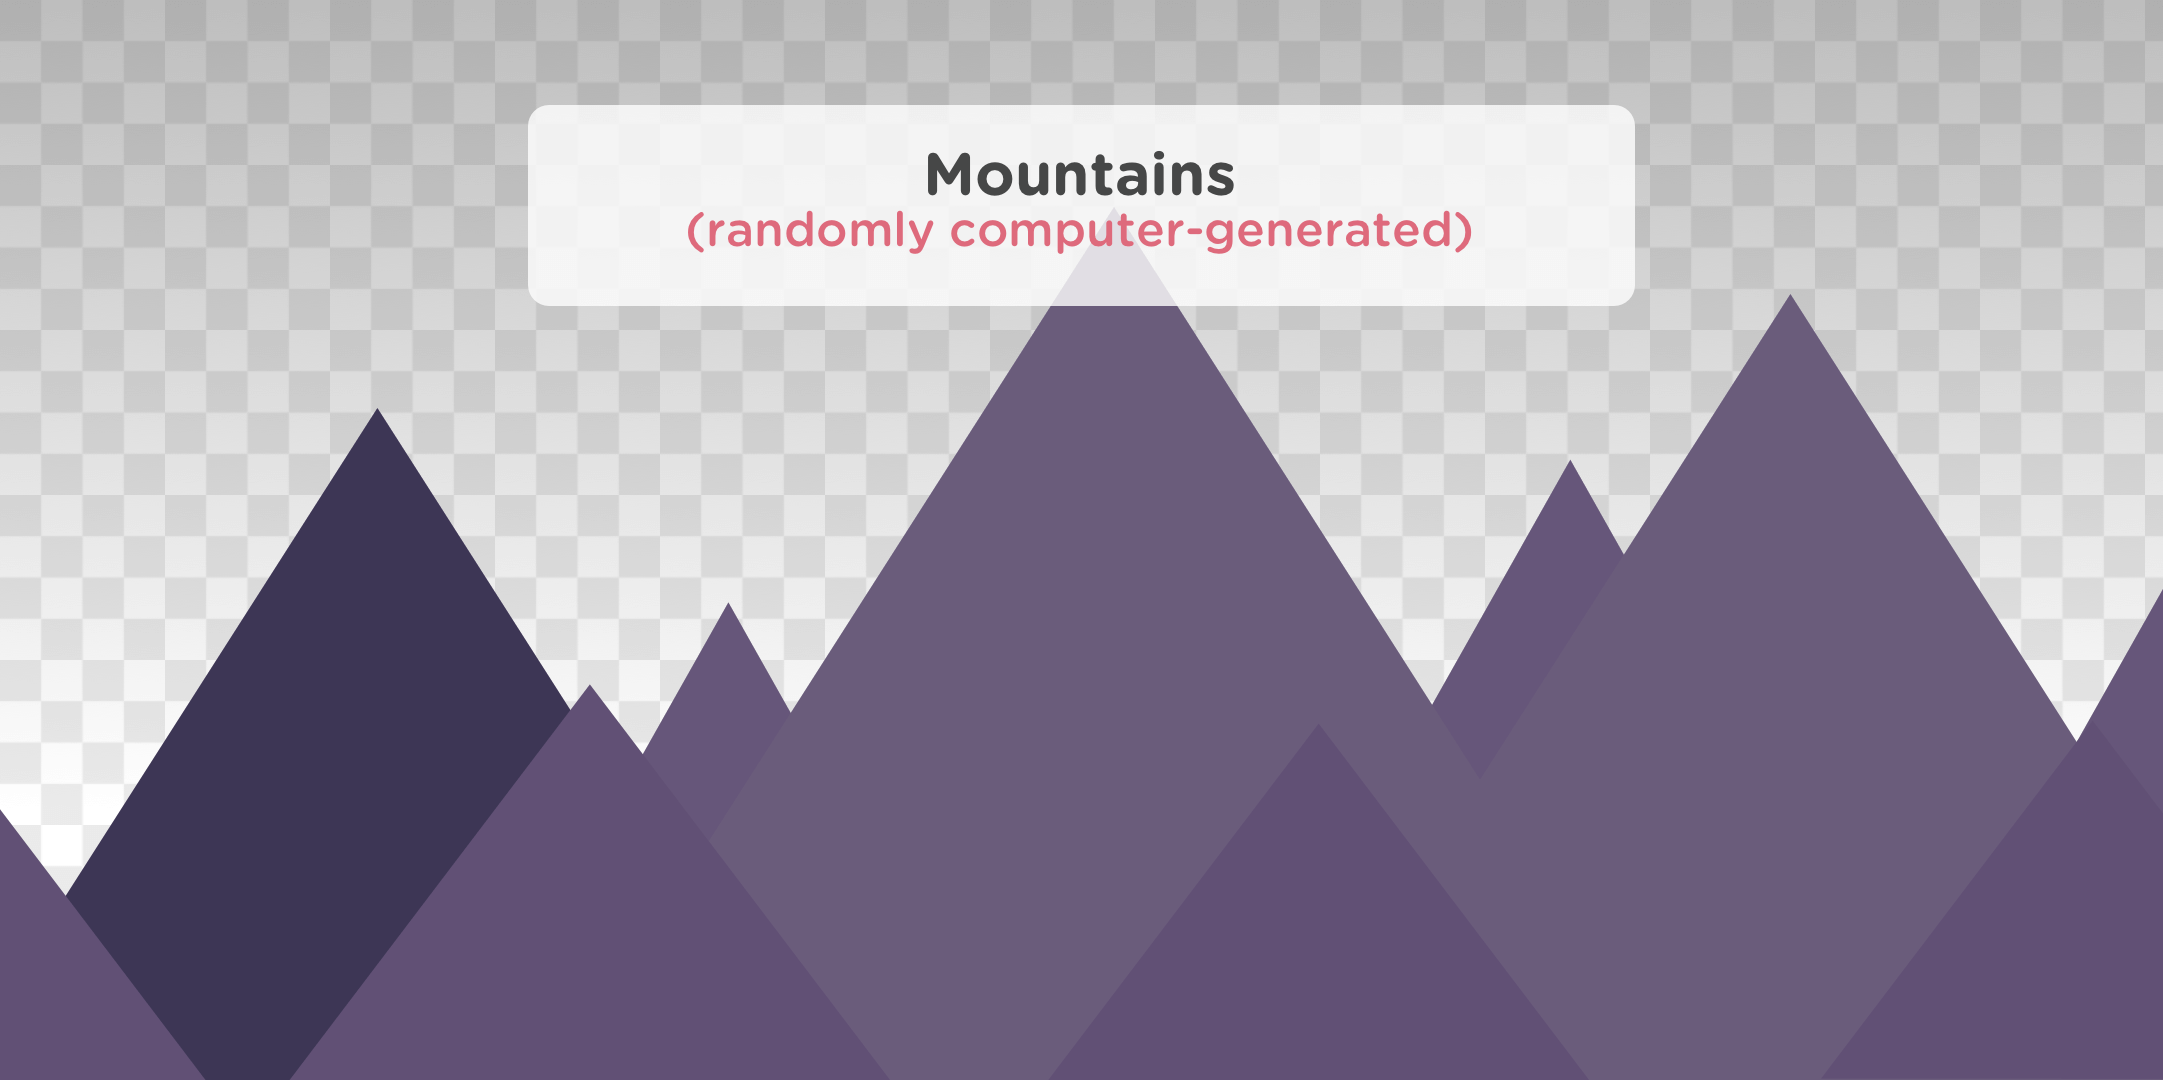
4. Rendering Mountains
Similarly to clouds, we can do the same for mountains.
/**
 * Creates a mountain object and returns it.
 * @param {number} x_pos - x position of the mountain.
 * @param {number} scale_val - scale of the mountain, where 1 is
 * 100% scale. (1.0 to 1.6 is recommended)
 */
function createMountain(x_pos, scale_val) {
  let mountainObj = {
    x_pos: x_pos,
    y_pos: game.floorPos_y,
    scale: scale_val,

    // Render this mountain.
    render: function () {
      push()
      translate(this.x_pos + game.scrollPos * 0.3, this.y_pos)
      scale(this.scale, abs(this.scale))
      noStroke()
      fill(102, 86, 122)
      triangle(252 + 50, -133, 177 + 50, 0, 327 + 50, 0)
      fill(61, 54, 85)
      triangle(64, -85, 0, 0, 129, 0)
      triangle(177, -187, 57, 0, 296, 0)
      pop()
    },
  }

  return mountainObj
}
Then it can be called in this way inside the setup() function.
setup() {
  let mountains = [];

  // Initialise mountains
  for (let i = 0; i < mountain.quantity; i++) {
    let randomMountain = createMountain(
      i * mountain.randomGap,
      i * mountain.randomScale,
    );
    // array of mountains to be rendered in draw() function
    mountains.push(randomMountain);
}

draw() {
  // Render mountains.
  for (let i = 0; i < mountains.length; i++) {
    mountains[i].render();
  }
}
5. Rendering Trees
Simaliarly with clouds and mountains, we can do the same for trees.
/**
 * Creates a tree object and returns it.
 * @param {number} x_pos - x position of the tree.
 * @param {number} scale_val - scale of the tree, where 1 is
 * 100% scale. (1.0 to 1.5 is recommended)
 */
function createTree(x_pos, scale_val) {
  let treeObj = {
    x_pos: x_pos,
    y_pos: game.floorPos_y,
    scale: scale_val,

    // Render this tree.
    render: function () {
      push()
      translate(this.x_pos + game.scrollPos * 0.7, this.y_pos)
      scale(this.scale)
      noStroke()
      fill(46, 42, 74)
      // main trunk
      quad(-18, 0, -3.8, -449, 9.56, -449, 22, 0)
      // branches
      triangle(54.5, -270.5, 7.43, -237.5, 13.4, -228.5)
      triangle(-70, -261, -6.4, -197.3, -4, -216.2)
      triangle(67.07, -215, 1, -170, 9.5, -158)
      triangle(-63, -181, -11.9, -128.5, -4.43, -139.73)
      fill(56, 51, 89)
      // top leaves
      triangle(2.5, -341, -48.5, -301, 53.5, -301)
      triangle(2.5, -387, -54.5, -327, 59.5, -327)
      triangle(2.5, -424, -54.5, -364, 59.5, -364)
      triangle(2.5, -461, -54.5, -405, 59.5, -405)
      pop()
    },
  }

  return treeObj
}
Then it can be called in this way inside the setup() function.
setup() {
  let trees = [];

  // Initialise mountains
  for (let i = 0; i < tree.quantity; i++) {
    let randomTree = createTree(
      i * tree.gap + tree.randomX,
      i * tree.randomScale,
    );
    // array of trees to be rendered in draw() function
    trees.push(randomTree);
}

draw() {
  // Render trees.
  for (let i = 0; i < trees.length; i++) {
    trees[i].render();
  }
}
Creating the Game Engine
The game engine has several basic mechanics required:
- Allow character movements with the keyboard or touch.
- Check if character collide with the coin (earn points).
- Check if character collide with enemy (minus live).
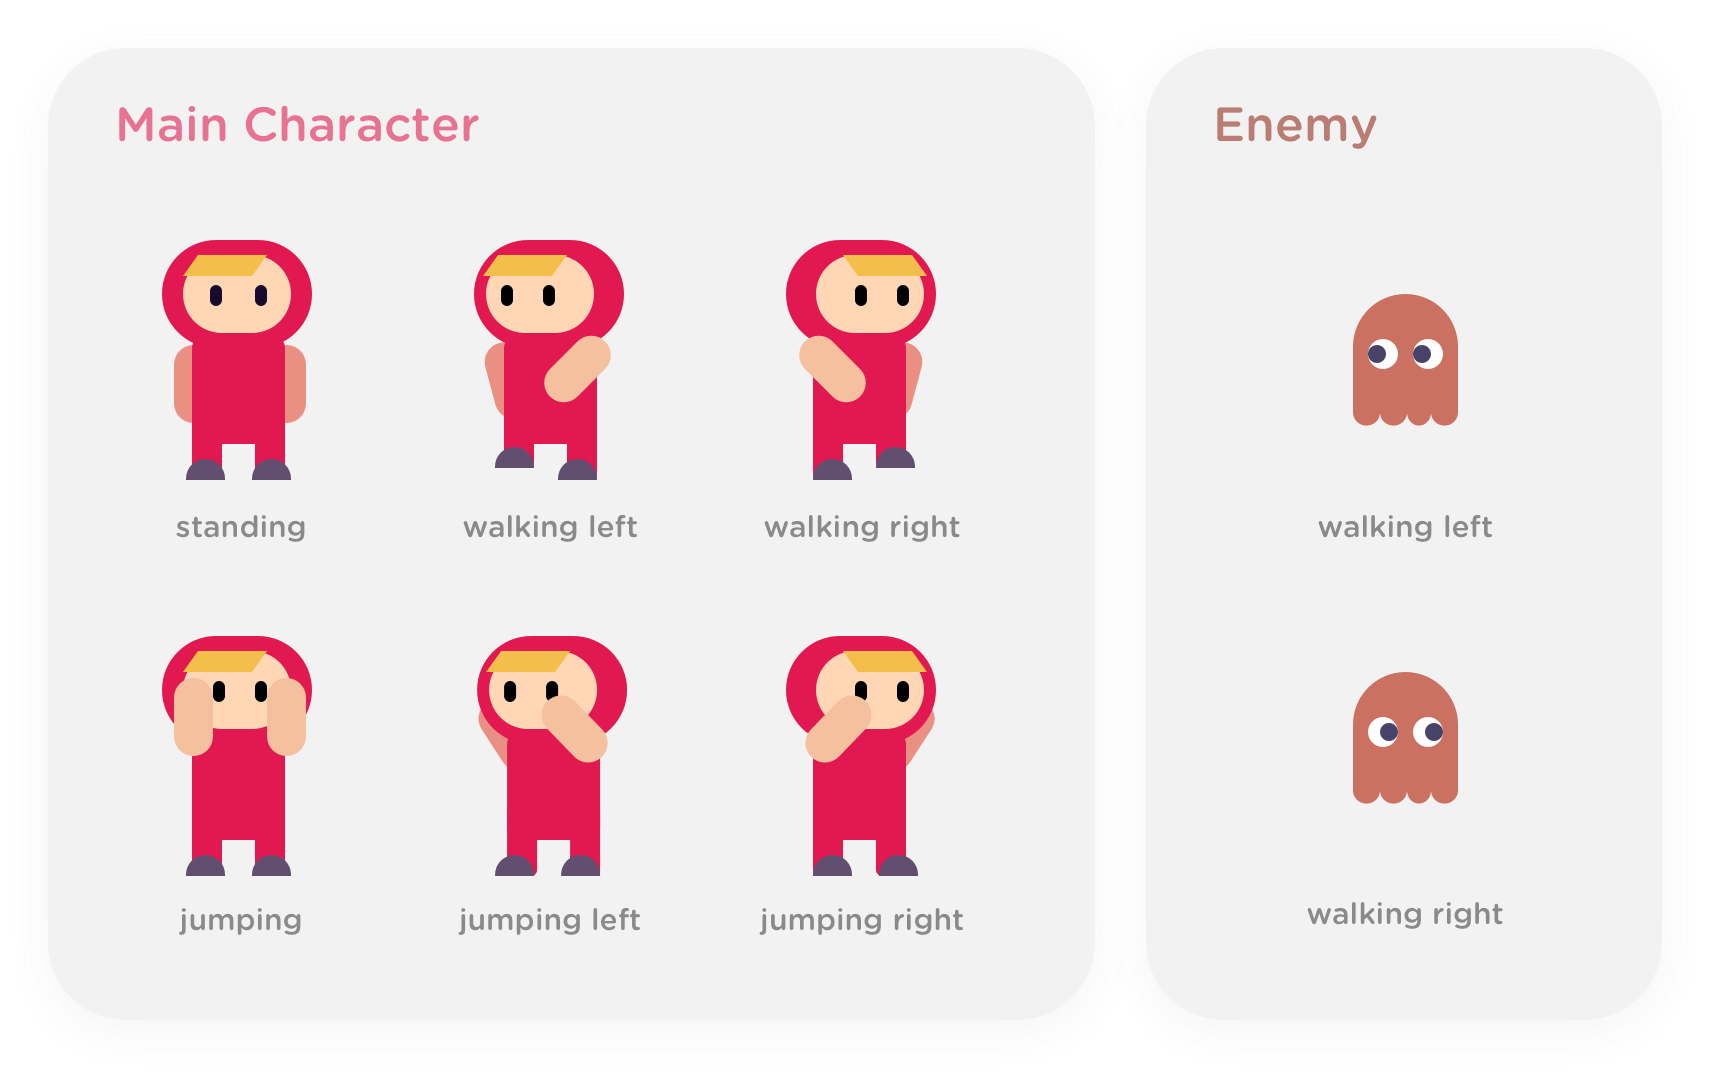
1. Character Rendering and Movements
The character rendering and its movements are created in a constructor function which contains the render and movement methods.
/**
 * Blueprint for a game character.
 * @constructor
 */
function Character() {
  // Character Render
  this.render = function () {
    //... Code for rendering different state of the character,
    // i.e. standing, walking, jumping, etc.
  }

  // Character Movement
  this.movement = function () {
    // Logic to make character move or background scroll.
    if (this.isLeft) {
      if (this.x_pos > width * 0.2) {
        this.x_pos -= 6
      } else {
        if (this.world_x_pos >= -600) {
          game.scrollPos += 6
        }
      }
    }

    if (this.isRight) {
      if (this.x_pos < width * 0.4) {
        this.x_pos += 6
      } else {
        game.scrollPos -= 6
      }
    }

    // Logic to make character rise and fall.
    if (this.y_pos < game.floorPos_y) {
      let isOnPlatform = false

      for (let i = 0; i < platforms.length; i++) {
        if (platforms[i].check(this)) {
          isOnPlatform = true
          this.isFalling = false
          break
        }
      }

      if (!isOnPlatform) {
        this.isFalling = true
        this.y_pos += 4
      }
    } else {
      this.isFalling = false
    }

    // Logic to make character plummet.
    if (this.isPlummeting) {
      this.y_pos += 30

      if (this.y_pos >= height) {
        this.respawn()
      }
    }

    // Updates character real world x position.
    this.world_x_pos = this.x_pos - game.scrollPos
  }

  //...
}
2. Collision Detection – Coins

In order to increase the scores, we need to detect when the character touches the coin. This logic can be implemented in the check method in the constructor function of the coin object and passing in the character object.
/**
 * Blueprint for coin.
 * @param {number} x_pos - x position of the coin
 * @param {number} y_pos - y position of the coin
 * @constructor
 */
function Coin(x_pos, y_pos) {
  /**
   * Check if character has collided with the coin,
   * then returns true. Otherwise, returns false.
   * @param {object} character - character object
   */
  this.check = function (character) {
    let d = dist(character.world_x_pos, character.y_pos, this.x_pos, this.y_pos)
    return d <= this.size + 50
  }
}
Somewhere in the code, we can add this logic to the main game engine:
if (coin.check(character)) {
  character.score(1)
}
3. Collision Detection – Enemy
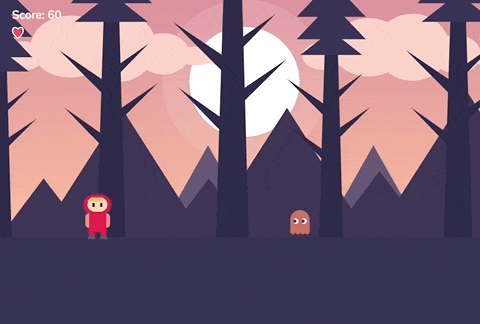
Similarly to the coin, we can do the same with enemy and reduce the character's lives by 1.
/**
 * Blueprint for enemy.
 * @param {number} x_pos - x position of enemy
 * @param {number} y_pos - y position of enemy
 * @param {number} walk_range - walking range of enemy by pixel
 * @constructor
 */
function Enemy(x_pos, y_pos, walk_range) {
  /**
   * Check if the character made contact with the enemy,
   * then returns true. Otherwise, returns false.
   * @param {object} character - character object
   */
  this.check = function (character) {
    return (
      dist(
        character.world_x_pos,
        character.y_pos,
        this.offset_x_pos,
        this.y_pos - 25
      ) < 45
    )
  }
}
Somewhere in the code, we can add this logic to the main game engine:
if (enemy.check(character)) {
  character.die(1)
}